Online Car Parts
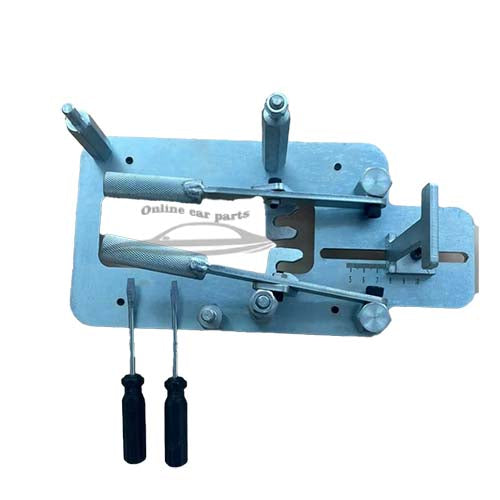
09430F0100 09430-F0100 Dual Clutch DTC Transmission Actuator Remover Installer Adjustment Repair Tool For Hyundai Elantra Tucson
09430F0100 09430-F0100 Dual Clutch DTC Transmission Actuator Remover Installer Adjustment Repair Tool For Hyundai Elantra Tucson
Prix habituel
$203.00 USD
Prix habituel
Prix promotionnel
$203.00 USD
Prix unitaire
par
Frais d'expédition calculés à l'étape de paiement.
Impossible de charger la disponibilité du service de retrait
09430F0100 09430-F0100 Dual Clutch DTC Transmission Actuator Remover Installer Adjustment Repair Tool For Hyundai Elantra Tucson
Inspection
1.
Remove the clutch actuator.
(Refer to Dual Clutch Transmission Control System - "Clutch Actuator Assembly")
2.
Install the clutch actuator (A) on special service tool (09430-F0100) and fix the actuator using nuts.
3.
Remove clutch actuator motor (A).
4.
Insert the special service tool (09430-F0100) into ball screw and rotate counter-clockwise until "clicking" sound is heard.
•
If "click" sound is not heard, rotate it counterclockwise until the ball screw cannot be rotated anymore.
•
Be careful as the actuator may be damaged by applying torque continuously counterclockwise when the ball screw cannot be rotated.
5.
Measure the length (C) from reference plane (A) to the end of rod (B).
New part length : 64 mm (2.5197 in.)
Perform clutch wear compensation reset or replace the clutch actuator based on the measured length (C).
•
C: Over 64 mm (2.5197 in.) - Replacement/clutch wear compensation reset is not required.
•
C: 38 mm (1.4961 in.) - 64 mm (2.5197 in.) - When replacing the clutch actuator, perform clutch waer compensation reset to the length (C) measured from the old clutch actuator.
(Refer to Clutch Actuator Assembly - "Adjustment")
•
C: Less than 38 mm (1.4961 in.) - Replace the dual clutch assembly, clutch actuator assembly and engagement bearing.
Installation
1.
Install in the reverse order of removal.
•
If clutch actuator needs replacement, measure the pull rod length of the old clutch actuator to determine if clutch wear compensation reset is needed.
(Refer to Clutch Actuator Assembly - "Adjustment")
•
If needed, perform clutch actuator clutch wear compensation reset .
(Refer to Clutch Actuator Assembly - "Adjustment")
•
Check the assembled state of the dowel pins (A) before installing the clutch actuator assembly.
•
When installing, check the color of the motor connectors (A, B). (A: gray, B: black)
•
Perform the clutch touch point learning procedure using the KDS/GDS after replacing the clutch actuator assembly.
Adjustment
Perform the work procedures for clutch wear reset by referring to the table below.
Replacement part
Remedy
Dual clutch assembly
Initialize
Clutch actuator assembly
Rewind
Dual clutch assembly + Clutch actuator assembly
Not required
How to rewind clutch wear compensation
1.
Install the faulty clutch actuator (A) on special service tool (09430-F0100) and fix the actuator using nuts.
2.
Remove clutch actuator motor (A).
3.
Insert the special service tool (09430-F0100) into ball screw and rotate counter-clockwise until "clicking" sound is heard.
•
If "click" sound is not heard, rotate it counterclockwise until the ball screw cannot be rotated anymore.
•
Be careful as the actuator may be damaged by applying torque continuously counterclockwise when the ball screw cannot be rotated.
4.
Measure the each length (C) from reference plane (A) to the end of rod (B).
5.
Pull the lever (A) until "click" sound is heard and then measure the each length (B) to check for pull rod length of faulty clutch actuator.
6.
Install the new clutch actuator (A) on special tool (09430-F0100) and fix the actuator using nuts.
7.
Remove clutch actuator motor (A).
8.
Insert the special service tool (09430-F0100) into ball screw and rotate counter-clockwise until "clicking" sound is heard.
•
If "click" sound is not heard, rotate it counterclockwise until the ball screw cannot be rotated anymore.
•
Be careful as the actuator may be damaged by applying torque continuously counterclockwise when the ball screw cannot be rotated.
9.
Remove sealing rubber (A).
10.
After inserting the clutch actuator adjusting tool (09430-C1300) into the service hole, rotate it clockwise and rewind the new clutch actuator pull rod to the length measured in step 4.
The pull rod length is shortened when rotating the clockwise direction.
11.
After pulling the lever (A) until "click" sound is heard, measure the length (B) and check that it is the same as the length measured in step 5.
12.
Install the sealing rubber (A).
13.
Install the clutch actuator motor (A).
Tightening torque :
3.9 - 5.9 N·m (0.4 - 0.6 kgf·m, 2.9 - 4.3 lb·ft)
Carefully check and install the O-rings (B).
How to initialize clutch wear compensation
1.
Install the clutch actuator (A) on special service tool (09430-F0100) and fix the actuator using nuts.
2.
Remove clutch actuator motor (A).
3.
Insert the special service tool (09430-F0100) into ball screw and rotate counter-clockwise until "clicking" sound is heard.
•
If "click" sound is not heard, rotate it counterclockwise until the ball screw cannot be rotated anymore.
•
Be careful as the actuator may be damaged by applying torque continuously counterclockwise when the ball screw cannot be rotated.
4.
Tighten the nut (A) after setting the T plates (B) to 64 mm (2.5197 in).
5.
Remove the sealing rubber (C).
6.
Insert special service tool (09430-C1300) to the sealing rubber hole and then move to the T plates (A) by rotating counter-clockwise.
The pull rod length is lengthened when rotating the conter-clockwise direction.
7.
Fix the pull rod to hook (B) and install the sealing rubber (A).
8.
Pull the lever (A) until "clicking" sound is heard and then measure the each length (B) again to check for specified length.
New part length : 82.5 mm (3.2480 in.)
9.
Install the clutch actuator motor (A).
Tightening torque :
3.9 - 5.9 N·m (0.4 - 0.6 kgf·m, 2.9 - 4.3 lb·ft)
Carefully check and install the O-rings (B).
Afficher tous les détails
Inspection
1.
Remove the clutch actuator.
(Refer to Dual Clutch Transmission Control System - "Clutch Actuator Assembly")
2.
Install the clutch actuator (A) on special service tool (09430-F0100) and fix the actuator using nuts.
3.
Remove clutch actuator motor (A).
4.
Insert the special service tool (09430-F0100) into ball screw and rotate counter-clockwise until "clicking" sound is heard.
•
If "click" sound is not heard, rotate it counterclockwise until the ball screw cannot be rotated anymore.
•
Be careful as the actuator may be damaged by applying torque continuously counterclockwise when the ball screw cannot be rotated.
5.
Measure the length (C) from reference plane (A) to the end of rod (B).
New part length : 64 mm (2.5197 in.)
Perform clutch wear compensation reset or replace the clutch actuator based on the measured length (C).
•
C: Over 64 mm (2.5197 in.) - Replacement/clutch wear compensation reset is not required.
•
C: 38 mm (1.4961 in.) - 64 mm (2.5197 in.) - When replacing the clutch actuator, perform clutch waer compensation reset to the length (C) measured from the old clutch actuator.
(Refer to Clutch Actuator Assembly - "Adjustment")
•
C: Less than 38 mm (1.4961 in.) - Replace the dual clutch assembly, clutch actuator assembly and engagement bearing.
Installation
1.
Install in the reverse order of removal.
•
If clutch actuator needs replacement, measure the pull rod length of the old clutch actuator to determine if clutch wear compensation reset is needed.
(Refer to Clutch Actuator Assembly - "Adjustment")
•
If needed, perform clutch actuator clutch wear compensation reset .
(Refer to Clutch Actuator Assembly - "Adjustment")
•
Check the assembled state of the dowel pins (A) before installing the clutch actuator assembly.
•
When installing, check the color of the motor connectors (A, B). (A: gray, B: black)
•
Perform the clutch touch point learning procedure using the KDS/GDS after replacing the clutch actuator assembly.
Adjustment
Perform the work procedures for clutch wear reset by referring to the table below.
Replacement part
Remedy
Dual clutch assembly
Initialize
Clutch actuator assembly
Rewind
Dual clutch assembly + Clutch actuator assembly
Not required
How to rewind clutch wear compensation
1.
Install the faulty clutch actuator (A) on special service tool (09430-F0100) and fix the actuator using nuts.
2.
Remove clutch actuator motor (A).
3.
Insert the special service tool (09430-F0100) into ball screw and rotate counter-clockwise until "clicking" sound is heard.
•
If "click" sound is not heard, rotate it counterclockwise until the ball screw cannot be rotated anymore.
•
Be careful as the actuator may be damaged by applying torque continuously counterclockwise when the ball screw cannot be rotated.
4.
Measure the each length (C) from reference plane (A) to the end of rod (B).
5.
Pull the lever (A) until "click" sound is heard and then measure the each length (B) to check for pull rod length of faulty clutch actuator.
6.
Install the new clutch actuator (A) on special tool (09430-F0100) and fix the actuator using nuts.
7.
Remove clutch actuator motor (A).
8.
Insert the special service tool (09430-F0100) into ball screw and rotate counter-clockwise until "clicking" sound is heard.
•
If "click" sound is not heard, rotate it counterclockwise until the ball screw cannot be rotated anymore.
•
Be careful as the actuator may be damaged by applying torque continuously counterclockwise when the ball screw cannot be rotated.
9.
Remove sealing rubber (A).
10.
After inserting the clutch actuator adjusting tool (09430-C1300) into the service hole, rotate it clockwise and rewind the new clutch actuator pull rod to the length measured in step 4.
The pull rod length is shortened when rotating the clockwise direction.
11.
After pulling the lever (A) until "click" sound is heard, measure the length (B) and check that it is the same as the length measured in step 5.
12.
Install the sealing rubber (A).
13.
Install the clutch actuator motor (A).
Tightening torque :
3.9 - 5.9 N·m (0.4 - 0.6 kgf·m, 2.9 - 4.3 lb·ft)
Carefully check and install the O-rings (B).
How to initialize clutch wear compensation
1.
Install the clutch actuator (A) on special service tool (09430-F0100) and fix the actuator using nuts.
2.
Remove clutch actuator motor (A).
3.
Insert the special service tool (09430-F0100) into ball screw and rotate counter-clockwise until "clicking" sound is heard.
•
If "click" sound is not heard, rotate it counterclockwise until the ball screw cannot be rotated anymore.
•
Be careful as the actuator may be damaged by applying torque continuously counterclockwise when the ball screw cannot be rotated.
4.
Tighten the nut (A) after setting the T plates (B) to 64 mm (2.5197 in).
5.
Remove the sealing rubber (C).
6.
Insert special service tool (09430-C1300) to the sealing rubber hole and then move to the T plates (A) by rotating counter-clockwise.
The pull rod length is lengthened when rotating the conter-clockwise direction.
7.
Fix the pull rod to hook (B) and install the sealing rubber (A).
8.
Pull the lever (A) until "clicking" sound is heard and then measure the each length (B) again to check for specified length.
New part length : 82.5 mm (3.2480 in.)
9.
Install the clutch actuator motor (A).
Tightening torque :
3.9 - 5.9 N·m (0.4 - 0.6 kgf·m, 2.9 - 4.3 lb·ft)
Carefully check and install the O-rings (B).
-
Expédition
Frais DHL/FEDEX/UPS en fonction du poids, du volume et de la longueur ! Besoin de contacter le service client pour consulter le fret!
-
Numéro de suivi
Après réception du paiement, nous mettrons à jour le numéro de suivi dans 2-3 jours !